
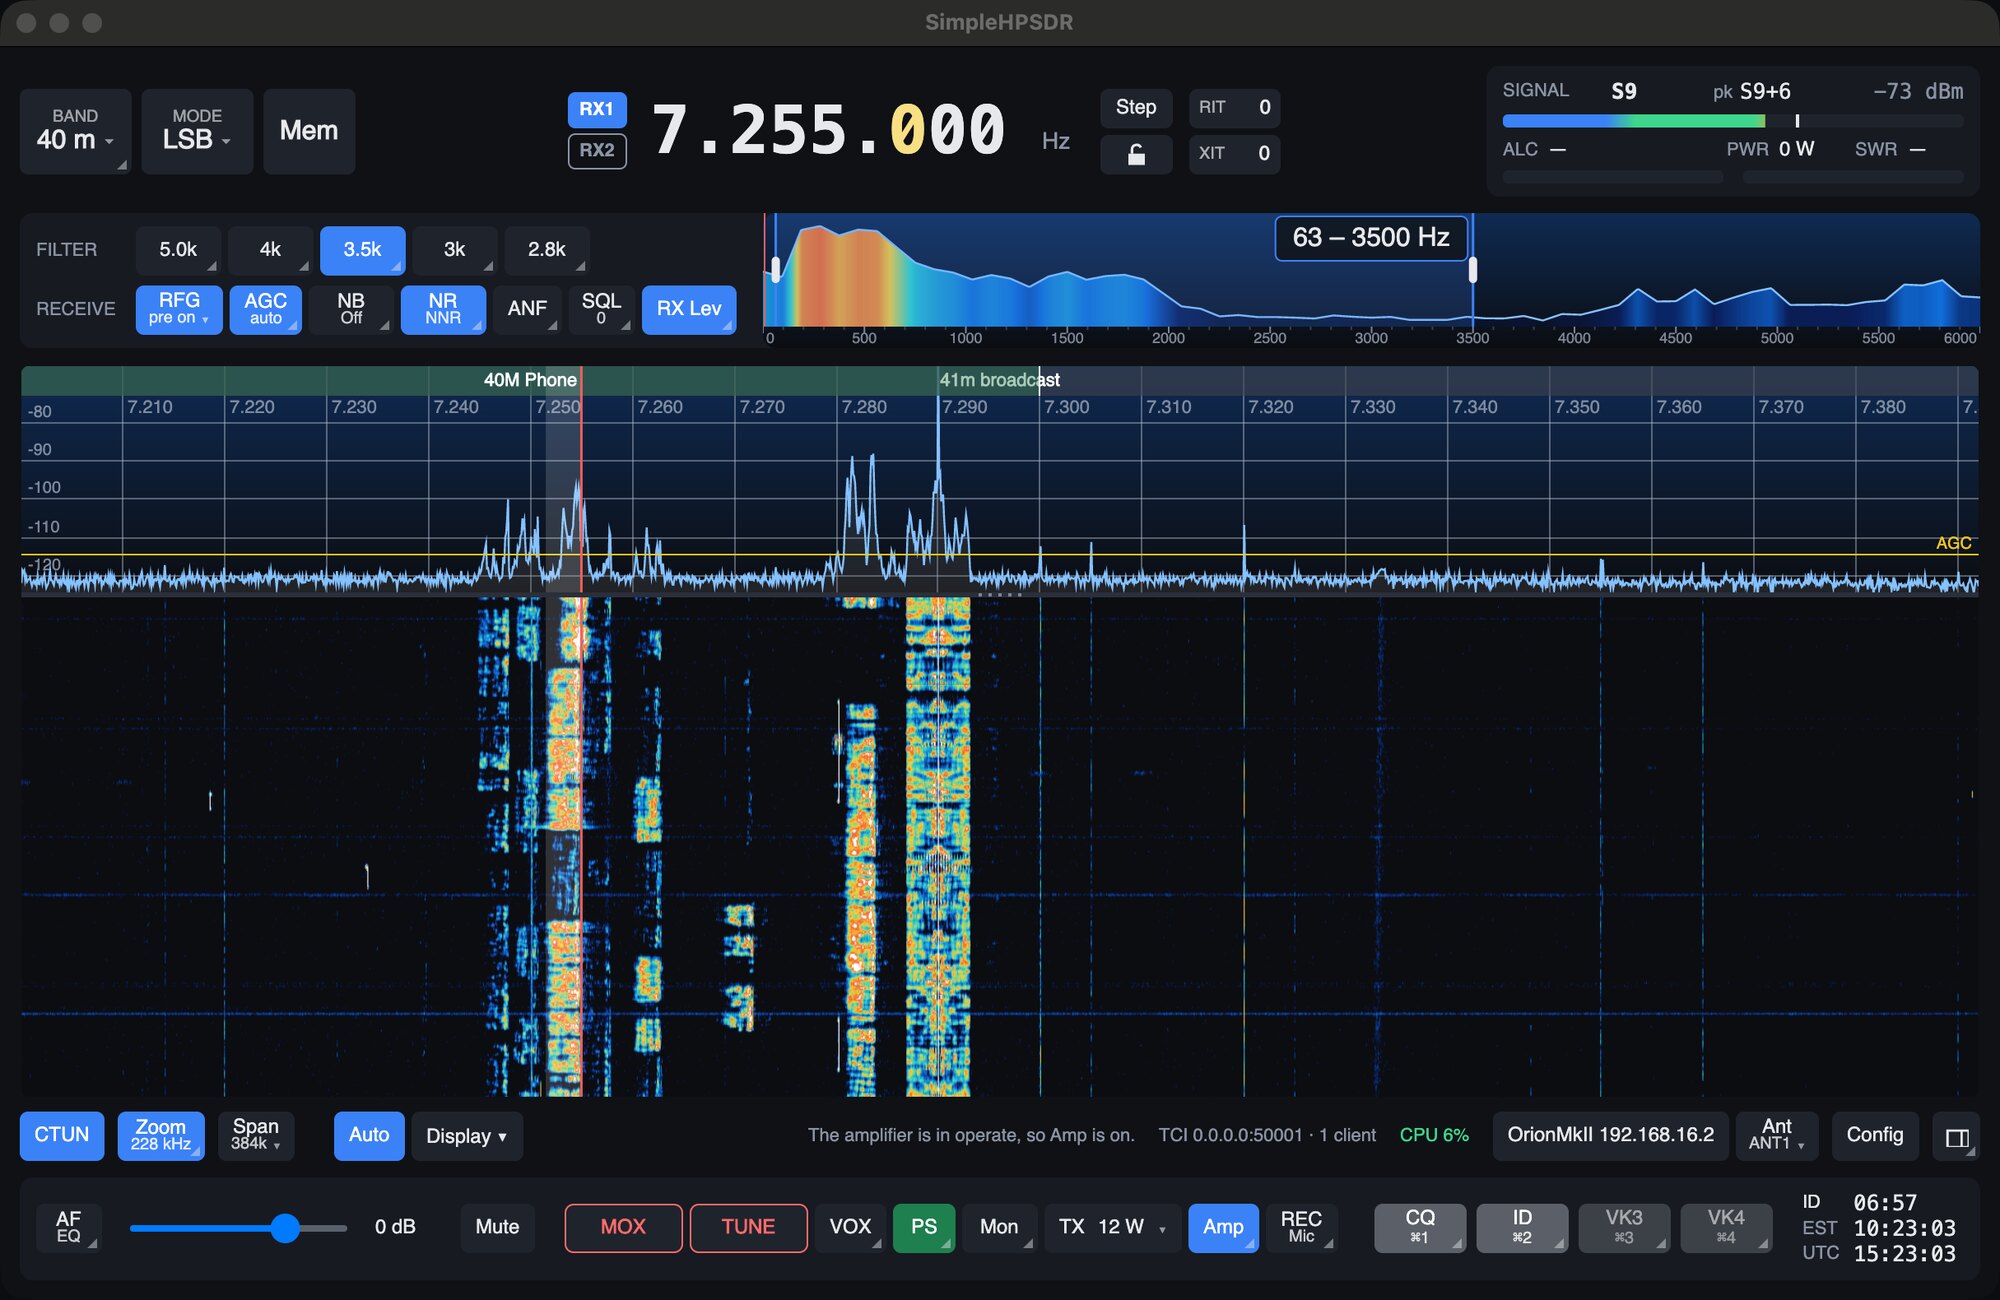
Everything you use while operating is in one window. This page names each part, so the rest of the guide can simply say "click AGC".
The parts of the window
 1
2
3
4
5
6
7
8
9
10
11
12
13
14
15
- 1Band, Mode and Mem. Choose a band and a mode; Mem holds 48 memories. Right-click BAND for that band's own saved frequencies.
- 2Receiver and frequency. RX1 and RX2 pick the receiver the controls act on. Roll the wheel over the frequency to tune, or click it and type.
- 3Step, lock, RIT and XIT. The tuning step, a padlock against bumping the dial, and the receive and transmit offsets.
- 4Meters. Signal strength with a peak marker, and ALC, power and SWR while transmitting. Right-click for the S-meter trim.
- 5Filters and receive controls. The filter buttons, then everything that shapes what you hear: RFG, AGC, NB, NR, ANF, SQL and RX Lev.
- 6Close-up. 6 kHz of received audio with the filter shaded. Drag the filter's edges here.
- 7Band strip. Your band plan: green where you may transmit, red where you may not, grey for broadcast bands, CB and WWV.
- 8Panadapter. Signal strength across the band. The red line is your frequency and the shaded band is your filter. Click a signal to tune to it.
- 9Waterfall. The same picture over time, newest at the top.
- 10Display controls. CTUN, Zoom, Span, Auto and Display set how much of the band you see and how it's drawn.
- 11Status, radio, Ant, Config and view. The status line, TCI and CPU; the radio's name (click it to change radio); the antenna; Config; and the view button that rearranges the window.
- 12Volume. The AF slider and Mute. The AF button itself is the receive EQ.
- 13Transmit. MOX and TUNE, then VOX, PS (PureSignal), Mon, the TX levels, Amp and REC.
- 14Voice keyer. Four buttons that each transmit a recording.
- 15Clock and ID timer. Local time and UTC, and a reminder to give your call every ten minutes.
The Tools menu has the antenna analyser and the wideband view, and the Help menu has the help window and update checks. On a Mac they're in the menu bar at the top of the screen.
Click, right-click and hover
The window stays simple because most buttons do two jobs. A click does the everyday thing, usually on or off. A right-click opens that control's settings.
- A small mark in a button's bottom right corner means it has more behind a right-click.
- A ▾ means a click opens a list or a popup.
- Blue means a control is on.
- Hover over anything for a short explanation.
- On a touch screen, a long press does what a right-click does. Holding the mouse button down on a button does the same.
For example, click SQL to turn the squelch on or off, and right-click it for its level:
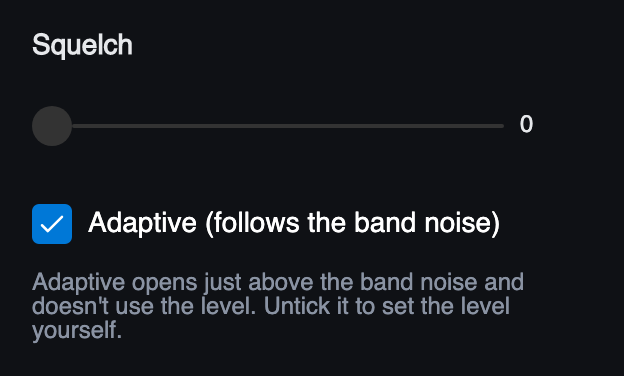
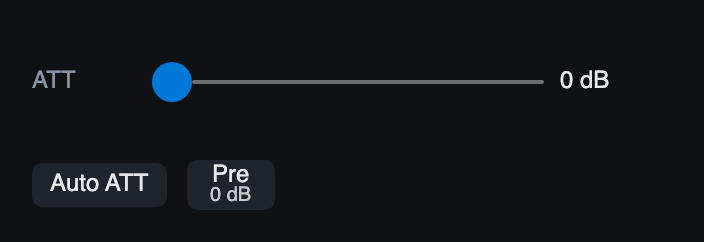
Popups close when you click somewhere else. Sliders in them also move with the mouse wheel.
Three arrangements
The view button, at the right end of the line under the panadapter, changes how the window is laid out. Each click steps to the next arrangement, or right-click it to pick one. Your choice is remembered.
Controls below the panadapter
The arrangement shown at the top of this page, with the controls above and below the panadapter.
Controls at the side
All the controls move into a panel at the side, and the panadapter gets the window's full height.
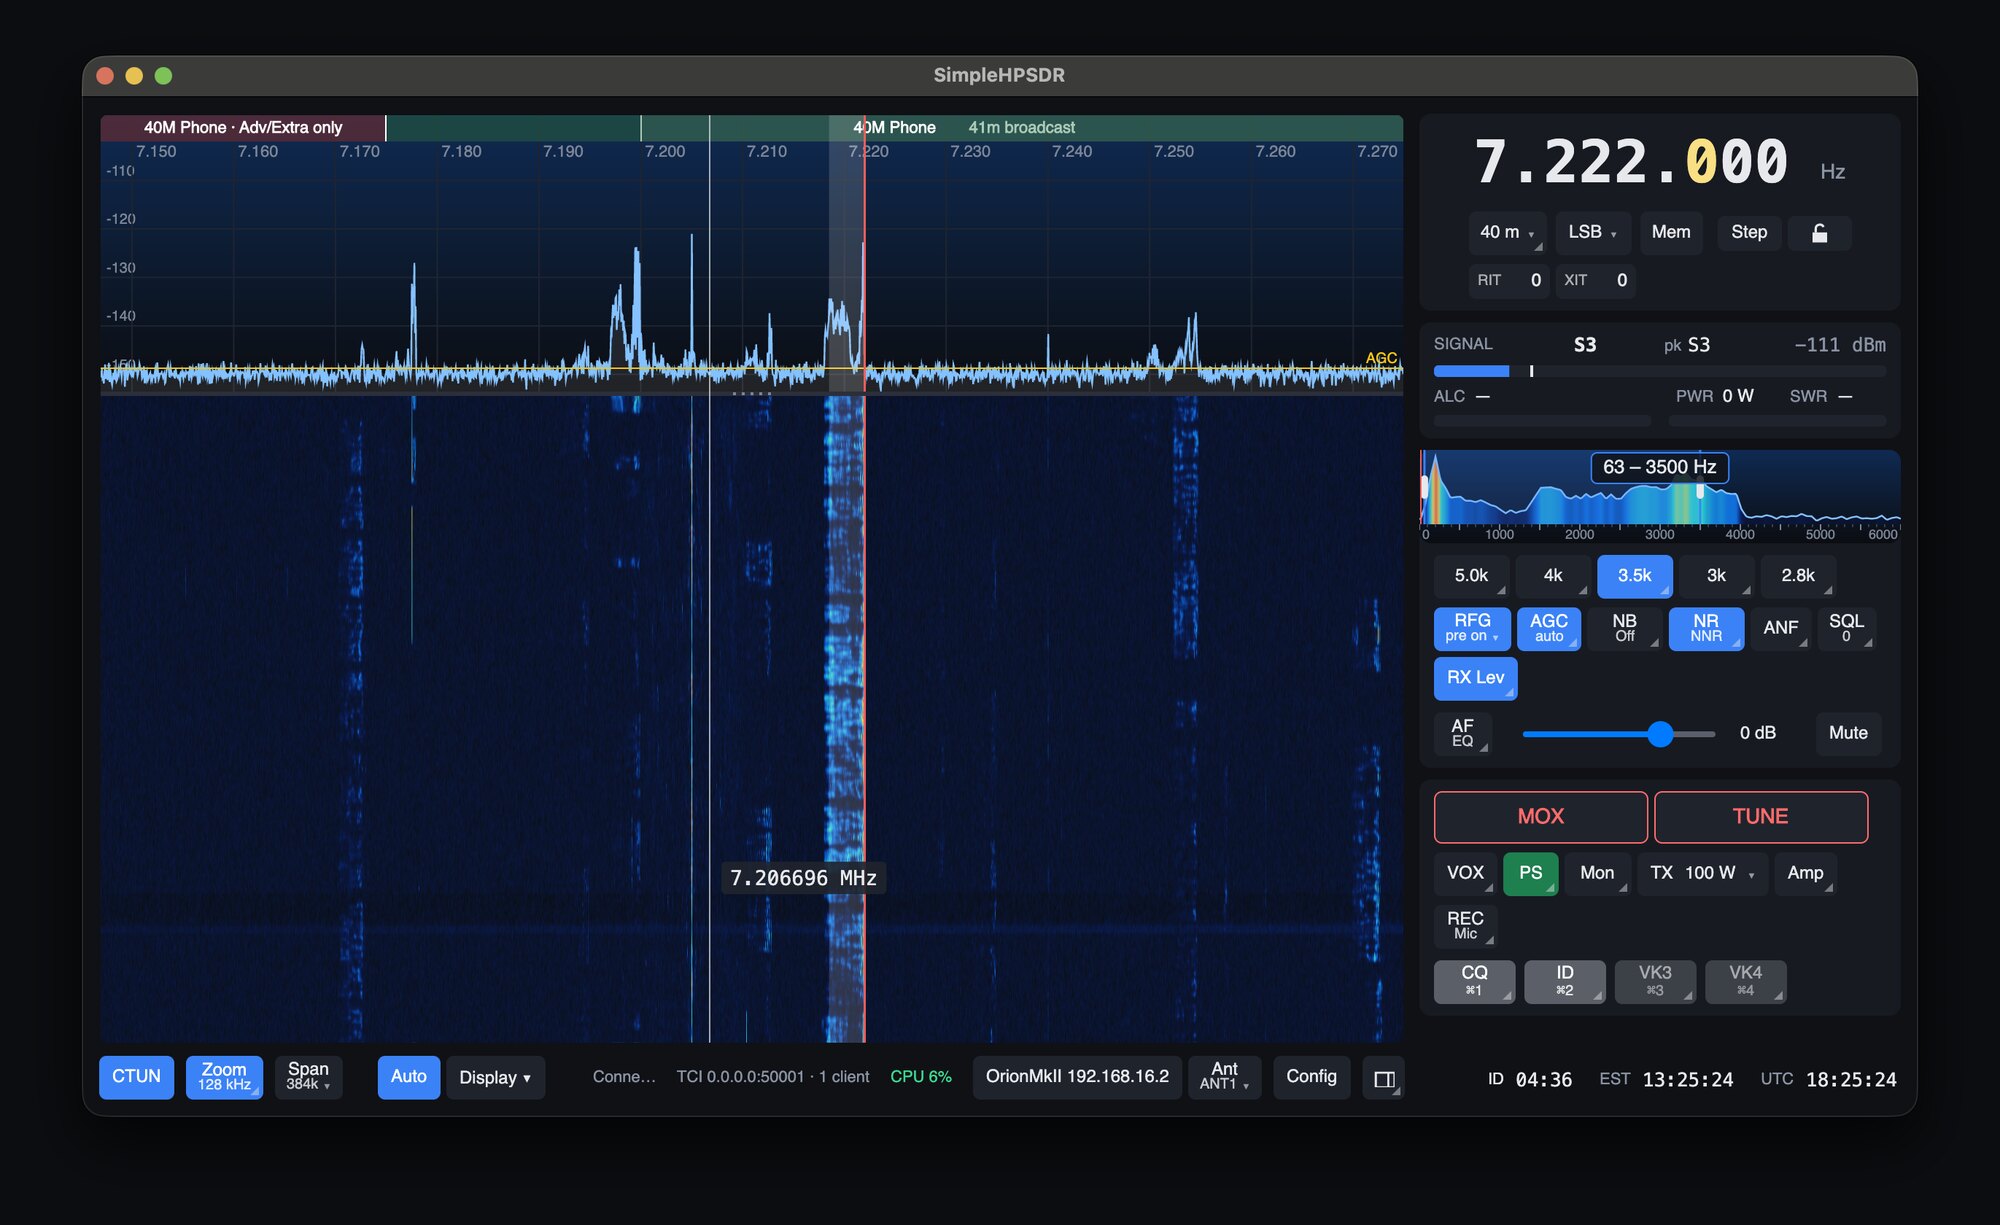
- Drag the bar between the panel and the panadapter to set the panel's width. Double-click the bar for the usual width.
- In a window too narrow for that width the panel gives way, and comes back when the window is wide again.
The mini window
The next click after the side panel (or Small window on the view button's right-click) swaps the main window for a small one you can keep in a corner of the screen. Drag its edges to any size and everything scales to fit.
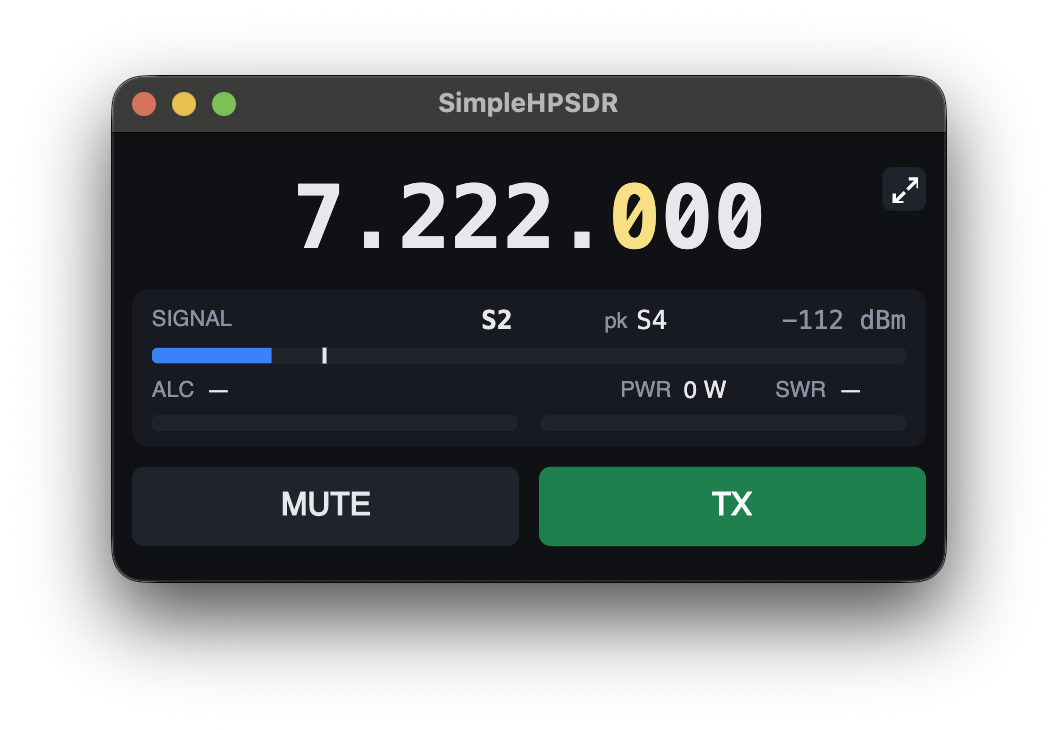
- The frequency tunes with the wheel, or click it to type one.
- Below it are the signal, power, SWR and ALC meters.
- MUTE turns red while the audio is muted.
- TX is green and turns red while transmitting. It only transmits while you hold it down, and it unkeys when you let go or click away. If MOX or TUNE is already on, TX does nothing.
The small arrows at the top right, or closing the mini window, bring the main window back.
The touch layout
On a screen narrower than 1080 pixels, such as the 1024 by 600 front panel of some radios, SimpleHPSDR switches to a layout with large buttons and opens full screen. You can also choose it on any screen: right-click the view button and choose Touch layout (large buttons), or set it in Config > Radio > Layout. Everything in it works with a mouse as well as a finger.
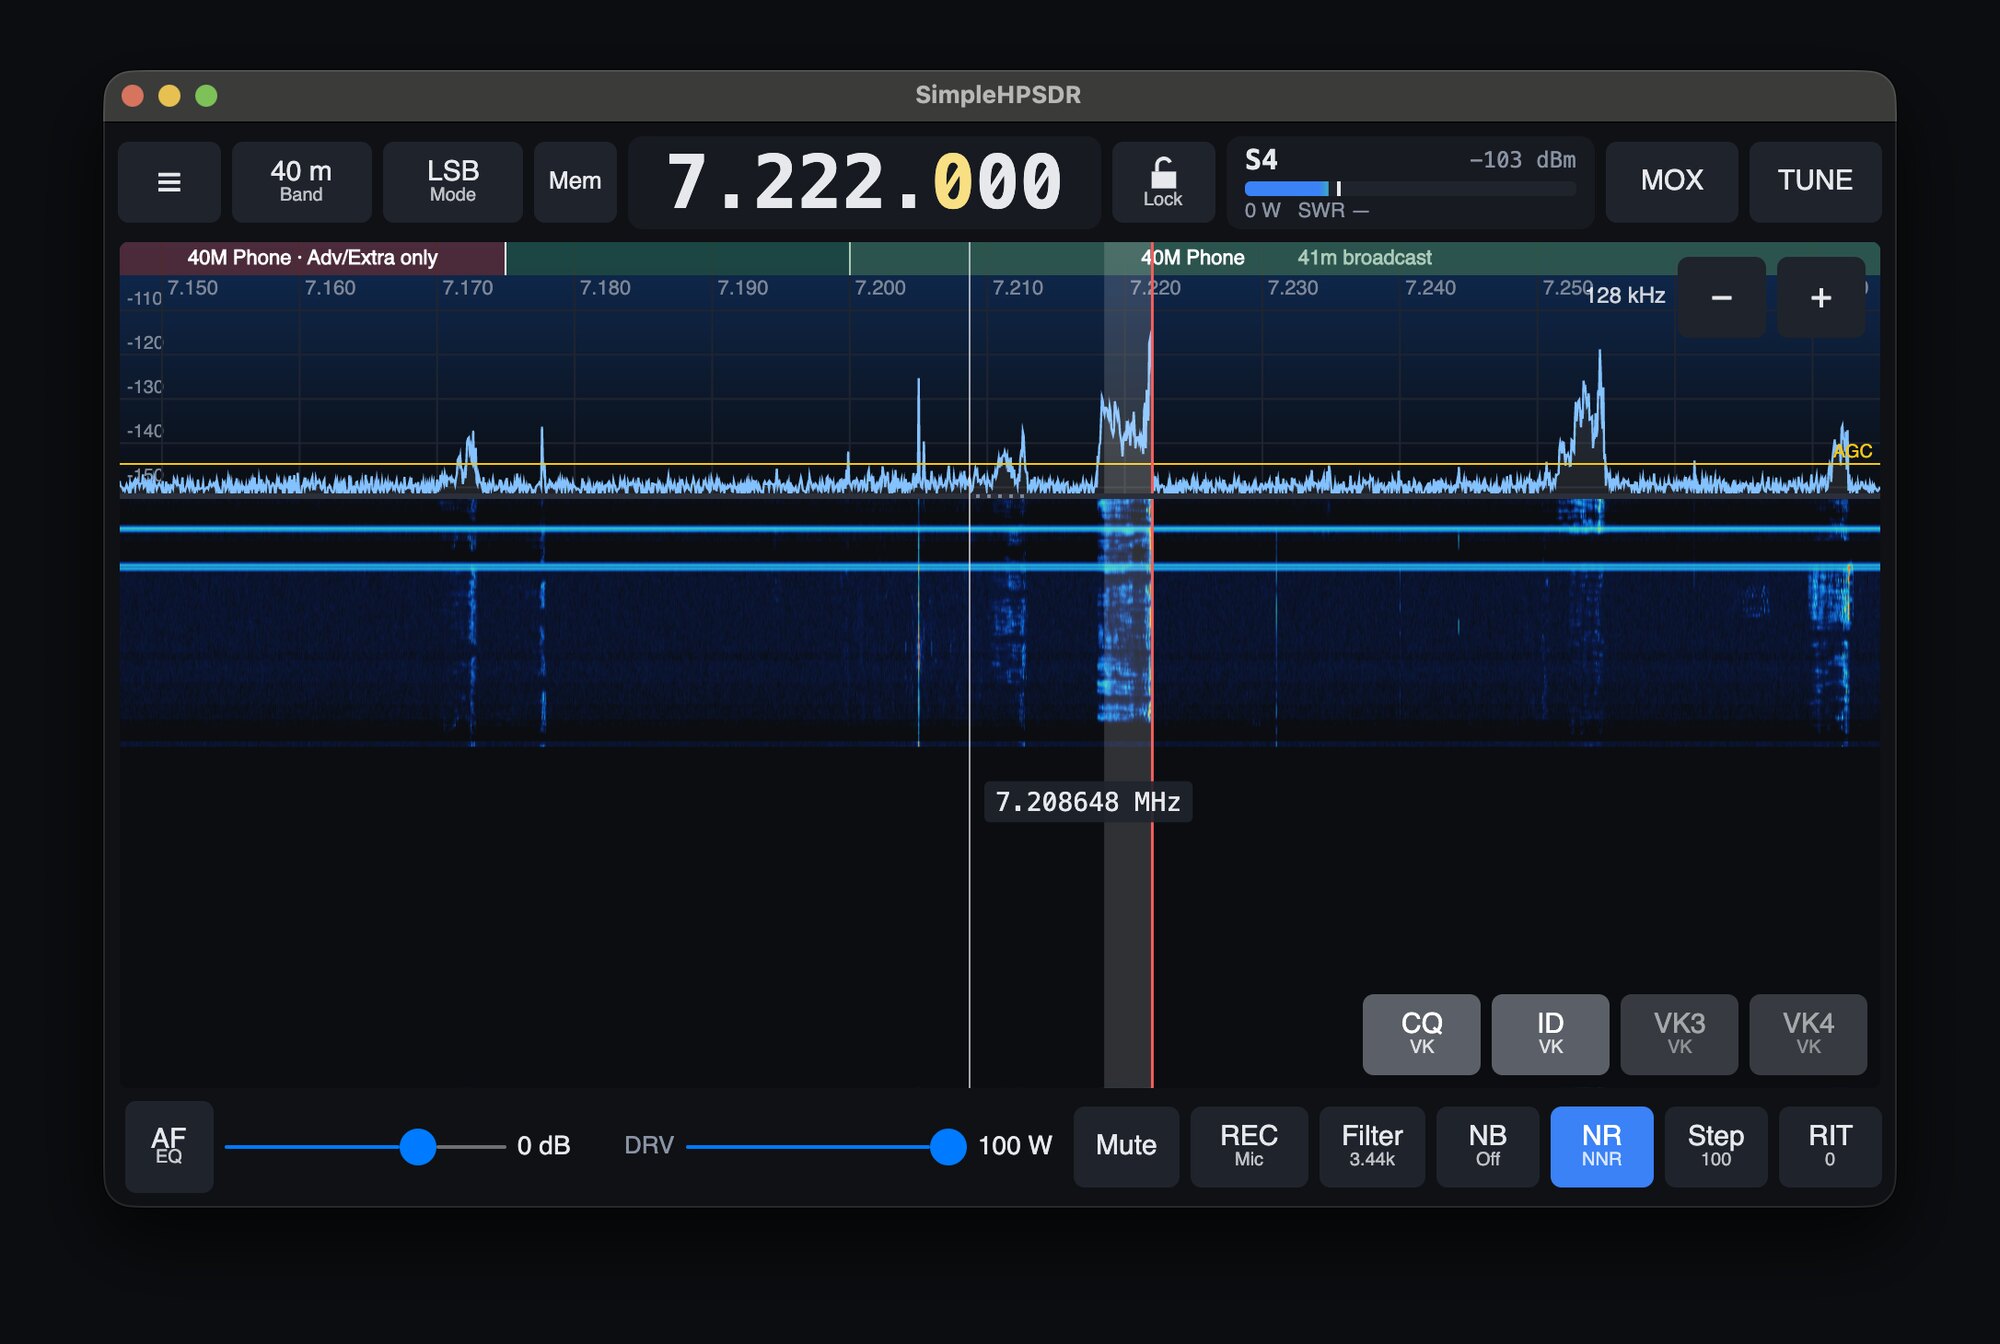
It has its own section: Touch screens and small screens.
Light and dark
SimpleHPSDR follows your system's light or dark setting. To fix it to one, choose Light or Dark under Theme in Config > Radio. The spectrum and waterfall colours are separate, in Config > Colors.
Coming from a traditional radio
Nearly everything on a front panel is here under a different name.
| On your radio | In SimpleHPSDR |
|---|---|
| VFO knob | The mouse wheel over the frequency or the panadapter. Step sets the size of each click. |
| Keypad entry | Click the frequency and type. |
| Band scope | The panadapter. The waterfall below it is the same picture over time. |
| AF gain | The AF slider. |
| RF gain | The Threshold slider on AGC's right-click, which sets where AGC starts working. |
| Preamp, attenuator | RFG. |
| IF width, filter | The filter buttons, or drag the edges in the close-up. |
| Noise blanker | NB. |
| Noise reduction | NR. |
| Notch | ANF, with manual notches on its right-click. |
| Second receiver | RX2. A second VFO on the same band: slice B. |
| Split | Put RX2 or slice B on the transmit frequency and transmit on it. |
| RIT and XIT | The same names, beside the frequency. |
| RF power | DRIVE, in the TX popup. |
| Mic gain | MIC, in the TX popup. |
| Speech processor | Config > TX Audio. |
| Monitor | Mon. |
| Antenna switch | Ant. |
| Menu system | Config. |
What's different is that you can see the band instead of tuning across it. A weak signal shows as a line in the waterfall before you can hear it, so you can click straight to it. The filters are also far steeper than crystal filters, and you can set their edges to any width.