Download
Packages for every system are on the Releases page. Take the newest release and the file for your computer:
| System | File |
|---|---|
| macOS 14 or later | The .dmg |
| Ubuntu, Debian, Raspberry Pi OS | The .deb: amd64 for a PC, arm64 for a Pi |
| Fedora | The .rpm |
| Arch | The .pkg.tar.zst |
| Windows 10 or 11 (x64) | SimpleHPSDR-<version>-win-x64-setup.exe |
Install on macOS
- Open the DMG and drag SimpleHPSDR to Applications.
- The app isn't signed by Apple, so the first time, open Terminal and run:
xattr -dr com.apple.quarantine /Applications/SimpleHPSDR.app - Start SimpleHPSDR. When macOS asks whether it may find devices on your local network, allow it. Without that the radio can't be found.
Install on Linux
Download the package for your distribution, then in a terminal in the folder it's in:
sudo apt install ./simplehpsdr_*.deb        # Ubuntu 26.04, Debian
sudo dnf install ./simplehpsdr-*.rpm        # Fedora
sudo pacman -U ./simplehpsdr-*.pkg.tar.zst  # Arch
SimpleHPSDR is then in the applications menu, or run simplehpsdr. To update, install the new package the same way.
Raspberry Pi
Use the 64-bit Raspberry Pi OS (Trixie or Bookworm) on a Pi 4 or Pi 5, or a CM4 or CM5. The 32-bit edition can't run it. Download the arm64 .deb, then:
cd ~/Downloads
sudo apt update
sudo apt install ./simplehpsdr_*_arm64.deb
apt fetches anything else it needs. To remove it later: sudo apt remove simplehpsdr. The first-start tuning described below takes much longer on a Pi than on a desktop computer, so leave it running.
On a small screen, SimpleHPSDR opens in its touch layout. See Touch screens and small screens, which also covers starting it at login and running it on an ANAN G2's own Pi.
Install on Windows
- Run
SimpleHPSDR-<version>-win-x64-setup.exe. It installs for you alone, with no administrator password, and adds SimpleHPSDR to the Start menu and to Settings > Apps for uninstalling. - The app isn't signed, so SmartScreen warns the first time. Choose More info, then Run anyway.
- If Windows Firewall asks about
StationEngine.exe, or asks to let it change your device, say yes, or the radio won't be found.
For a new version, run its setup. Your settings are kept in %LOCALAPPDATA%\SimpleHPSDR, so they carry over to new versions and stay if you uninstall. The .NET and Visual C++ runtimes are included.
To use ASIO, install your audio interface's driver, then pick ASIO under Config > Audio. The driver must be able to run at 48 kHz.
Fewer people use the Windows build than the others, so please report what you find.
The first start
The very first start takes a while. The signal processing is measured and tuned for your computer, which takes around 8 minutes on a fast machine and longer on an older one. A window shows the progress. A Raspberry Pi skips this: its package brings the tuning ready-made.
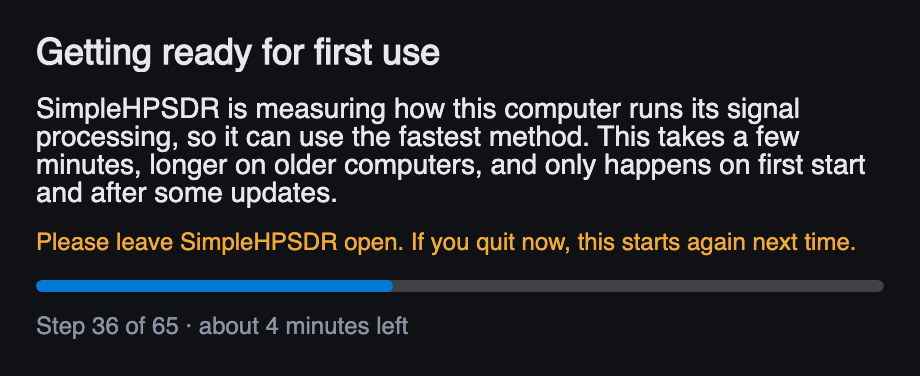
Leave the app open until it finishes. If you do quit, it carries on from where it stopped next time (on Windows it starts again). This only happens again after some updates.
Choose your band plan
Next, SimpleHPSDR asks for the band plan for your region or licence class. Pick yours and press Continue.
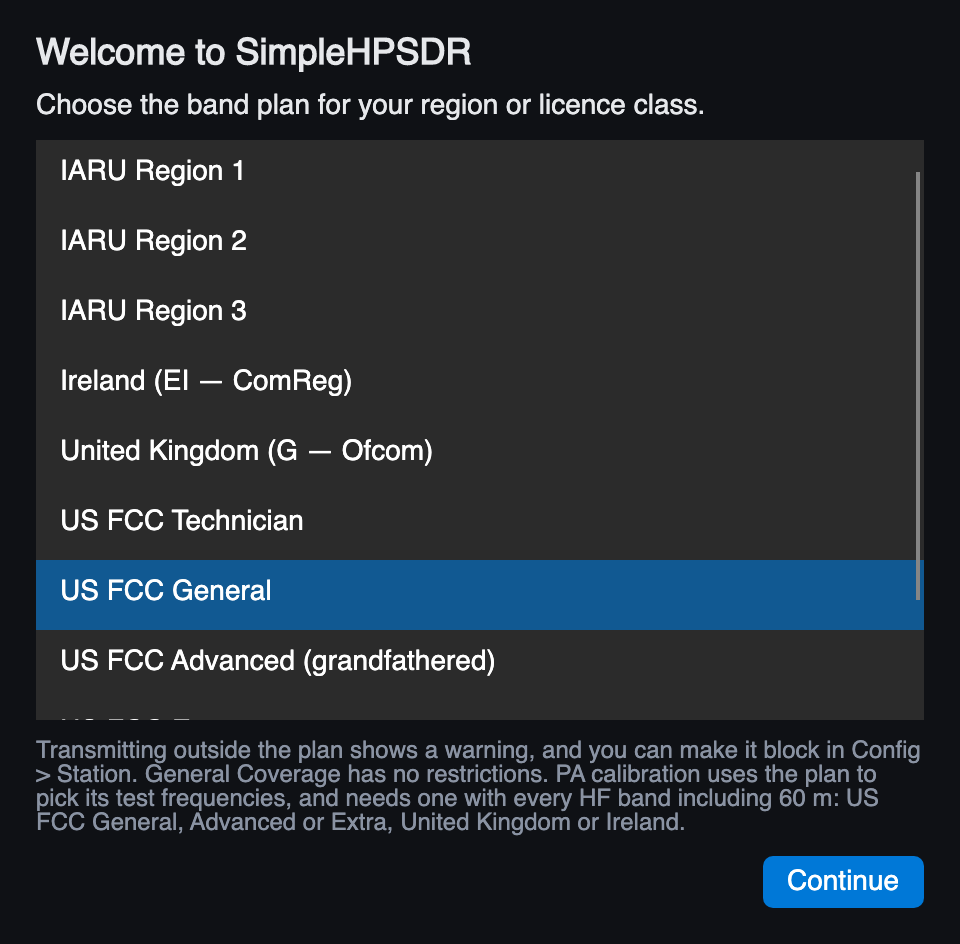
The plan does three things:
- It colours the band strip along the top of the panadapter: green where your licence lets you transmit, red where the band is kept for another licence class, and grey for broadcast bands, CB and WWV.
- It decides what happens when you transmit outside the plan. To start with you get a warning. You can make it block transmit instead in Config > Station.
- PA calibration uses it to pick its test frequencies, and needs a plan with every HF band including 60 m: US FCC General, Advanced or Extra, United Kingdom or Ireland.
General Coverage has no restrictions, so staying legal is up to you. You can change the plan at any time in Config > Station.
Choose your radio
The radio picker opens next and searches your network. Pick your radio and press Connect.
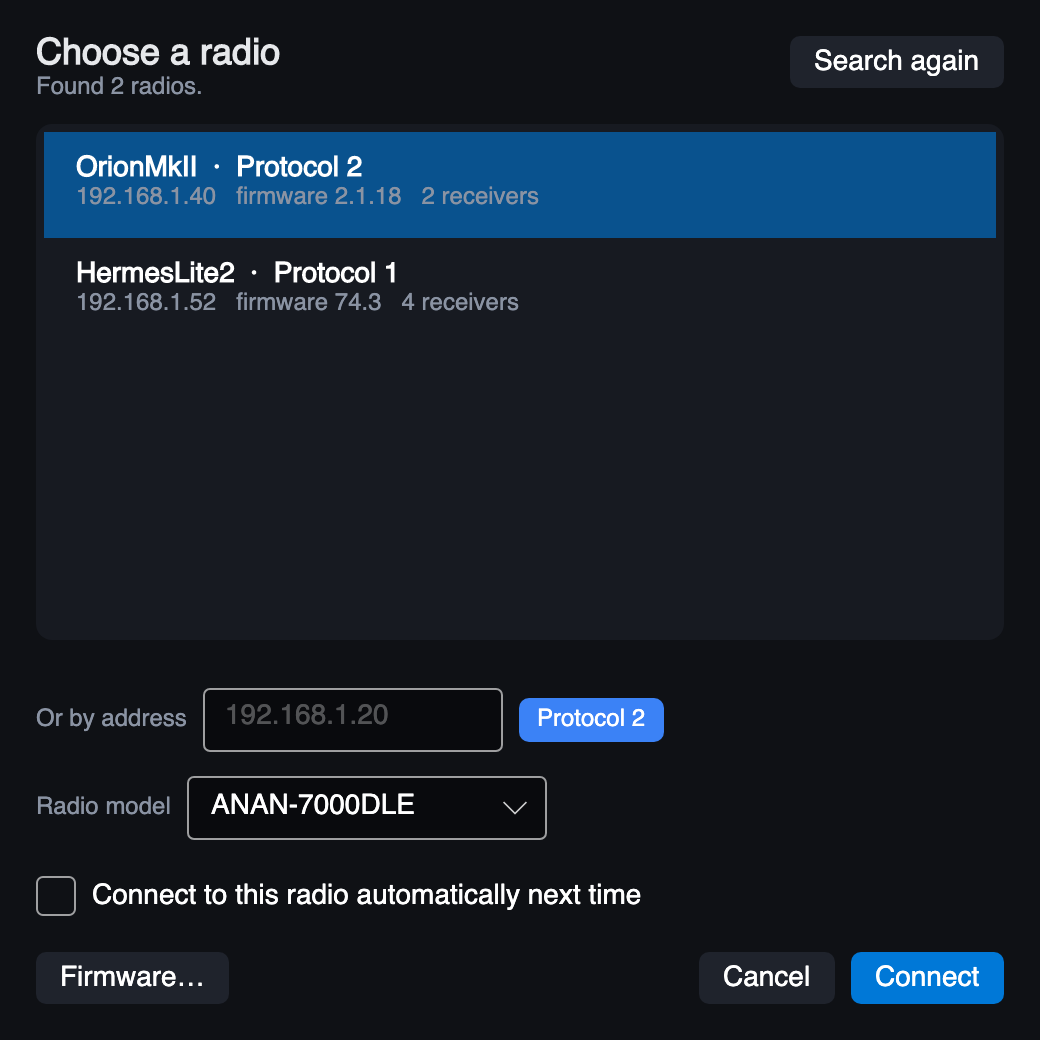
- Radio model. Several radios report the same ID on the network (the ANAN-G2, G2-1K, 7000DLE, 8000DLE, Orion MkII, Anvelina Pro3 and Red Pitaya all look alike), so choose yours when the list appears. It sets the S-meter calibration and the power amplifier and PureSignal defaults. You can change it later in Config > Radio.
- Connect to this radio automatically next time skips the picker from then on.
- IN USE beside a radio means another program is controlling it. Taking over stops it there, including any transmission in progress.
- Or by address. If your radio isn't listed, type its IP address. Leave Protocol 2 lit for a Protocol 2 radio.
- Firmware… opens the firmware loader for Protocol 2 radios. Read the warning first.
Brick SDRs (Brick2 and Brick3) are recognised and named in the list.
If no radio appears
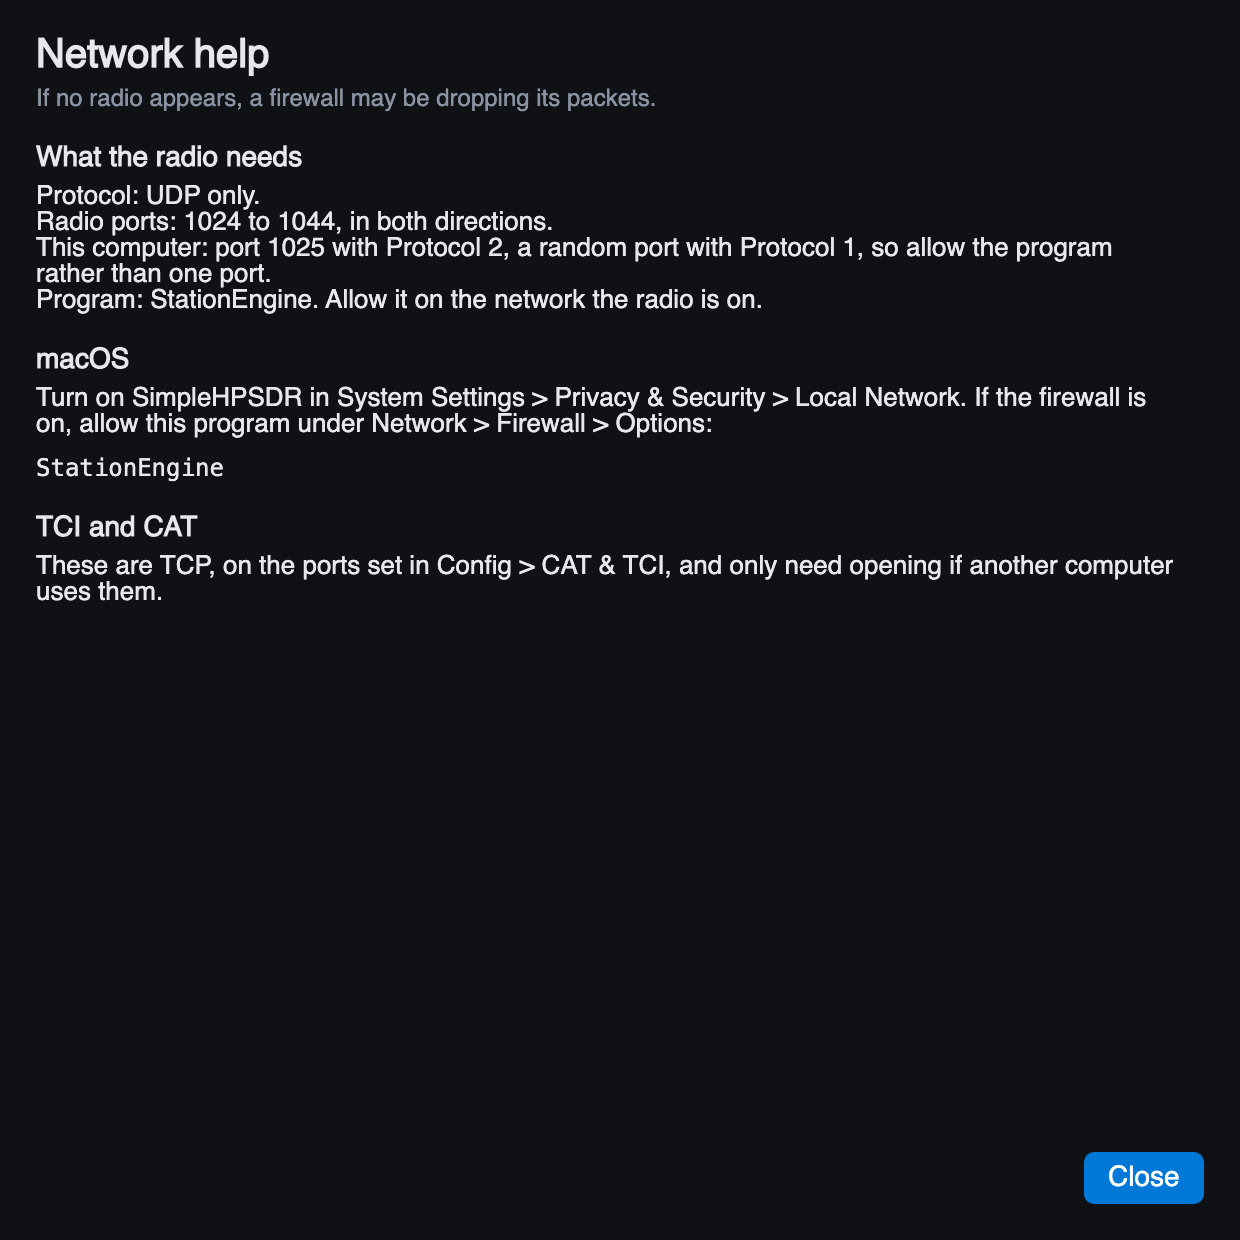
Check that the radio is on and on the same network, then press Search again, or type its address. If it still isn't found, a firewall is probably dropping its packets. The picker's Network help… button lists exactly what has to be allowed.
Firewalls
The radio uses UDP only, on radio ports 1024 to 1044 in both directions. This computer's port is 1025 with Protocol 2 and random with Protocol 1, so where your firewall can allow a program rather than a port, allow the StationEngine program.
- macOS: turn on SimpleHPSDR in System Settings > Privacy & Security > Local Network.
- Windows: answer yes when asked about StationEngine. If the picker finds nothing and no rule exists, it offers to add the rule again.
TCI and CAT are TCP, on the ports set in Config > CAT & TCI, and only need opening if another computer uses them.
Your first few minutes
- Click BAND at the top left and choose a band, then MODE: LSB for voice below 10 MHz, USB above.
- Click a signal on the panadapter, or roll the mouse wheel over the frequency to tune.
- Set the volume with the AF slider at the bottom left.
- If you hear nothing, open Config > Audio and choose your speakers under Speaker output.
The next chapter, The main window, shows what everything on screen is.
Where things live
Settings, the engine's database and its logs are in the app data folder:
| macOS | ~/Library/Application Support/SimpleHPSDR |
| Linux | ~/.local/share/SimpleHPSDR |
| Windows | %LOCALAPPDATA%\SimpleHPSDR |
engine.log is the log from this start and engine.previous.log the one before. The engine's detailed log is logs/simplehpsdr-app.log. The tuning file from the first start (wdspWisdom01) is there too. Recordings are WAV files in Music/SimpleHPSDR.
To move to another computer, or before trying something risky, use Back up in Config > Station: it saves all your settings to one file.